Monitor Tab
The Monitor tab allows you to select which source you would like to monitor through the monitor loudspeaker or headphone jack. You can monitor the inputs, outputs, amplifiers, or microphone source. The DPM / DPM Manager must be in Live mode to use the monitor functionality.
The following is a brief description of each of the monitored areas, and functionality.
Inputs and Outputs
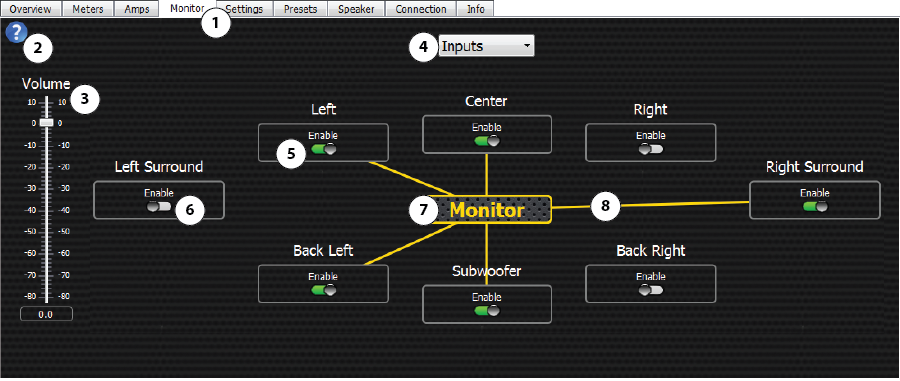
The user interface for the Inputs and Outputs is the same.
NOTE: The availability of the controls is based on the Crossover configuration on the Settings tab.
Inputs represent the input signal to the DPM before processing. The Outputs represent the output of the DPM to the amplifiers after processing.
- Monitor Tab – Provides access to the DPM monitoring controls.
- Help – Click the
 button to access the help system and read about the Monitor functionality.
- Volume Fader – Controls the volume for the monitor loudspeaker. Range is -80 to +10 dB.
- Drop-down List – Click to select Inputs or Outputs.
- Control Box – Each control box displays the Channel label and control switch. The control switch for this channel is shown in the Enable position.
- Enable switch shown in the not-Enabled position.
- Monitor – Represents the Monitor.
- Connections – indicates the current connections between the Inputs (or Outputs) and the Monitor.
Amplifiers
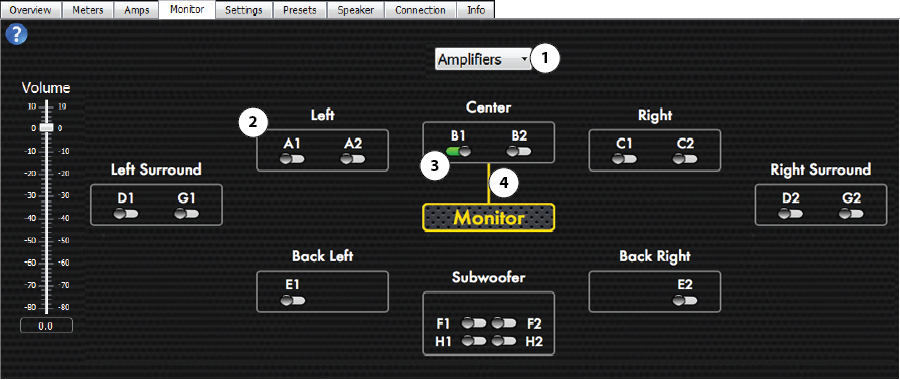
The Amplifiers selection represent the output signal from the amplifier.
NOTE: The availability of the controls is based on the Crossover configuration on the Settings tab.
- Drop-down List – Click to select Amplifiers.
- Control Box – Label and control check-box for the channel. (A1 = DataPort A, Channel 1)
- Channel On / Off Switch – Click to connect or disconnect the DataPort output to the Monitor. You can select only one DataPort output at a time.
- Connection – Indicates the current connection between the Monitor and Amplifier channel.
Microphone
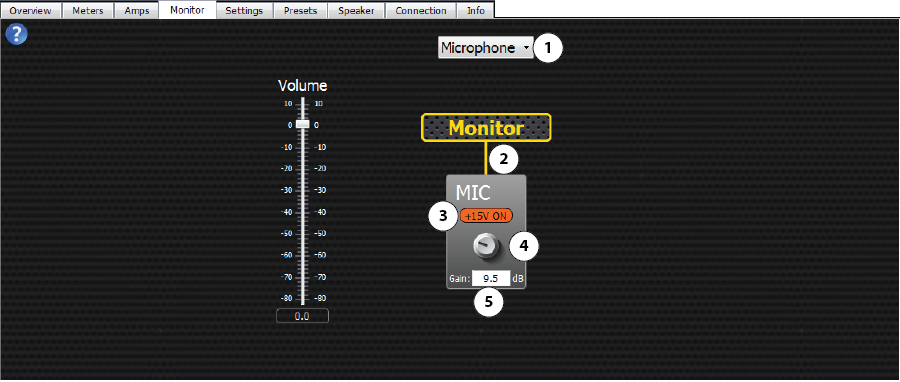
The Microphone represents the input signal to the DPM from the talkback microphone.
- Drop-down List – Click to select Microphone.
- Connection – indicates that the signal from the microphone is connected to the Monitor. You cannot disconnect the microphone from the monitor from this screen.
- +15 V On / Off Switch – Click to turn +15 V phantom power on or off. Used for condenser microphones.
- Gain Knob – Click, hold, and drag the mouse cursor up or down to control the microphone gain.
- Gain (dB) Readout – Use your mouse to select the number, then type in a new number.
© 2016 QSC, LLC. All rights reserved.
